1.引言
从YOLOv1、YOLOv2、YOLOv3-6,以及各个变种YOLOR、YOLOX,YOLO系列的目标检测器一只都是学界和工程界的热点。最近YOLOv7被CVPR2023收录再次使得YOLO系列目标检测器得到了大家的关注。从放出来的结果来看,YOLOv7不仅MAP还是推理时延都超越了当前以往各种YOLO系列的检测器,也超过了以Dual-Swin-T为代表的transformer系列(见下图)。
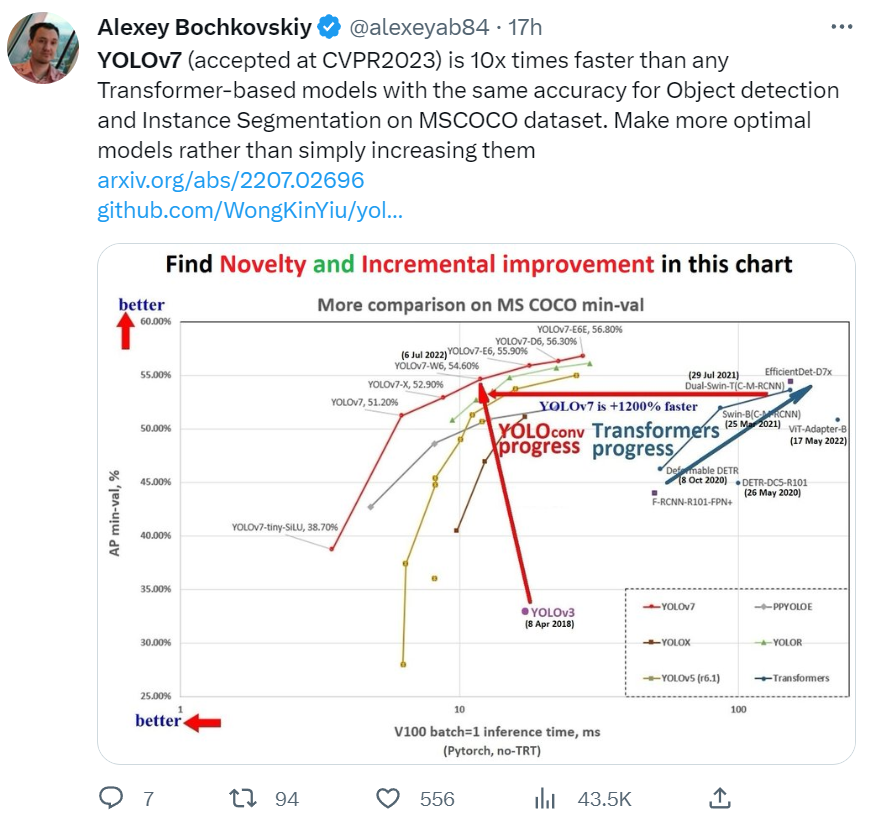
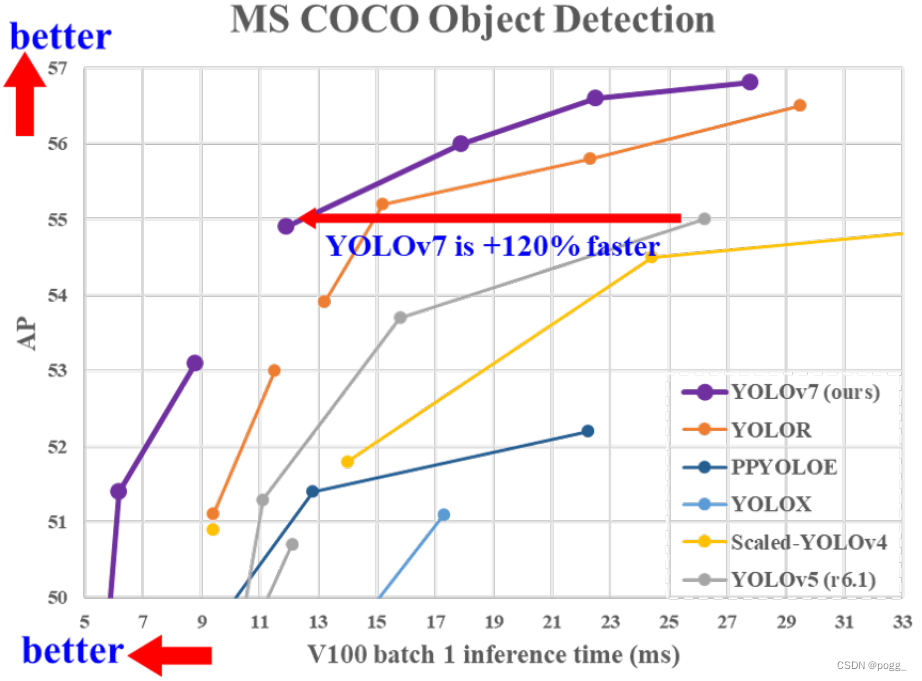
此外,就YOLO系列来说,AP大小接近时,YOLOv7快了1.2倍,这对于服务器端节约计算资源和边缘设备部署来说是相当重要的。
本文以尝鲜为目的,不会深入的探究原理,而是从“用起来”的角度迅速的体验一下训练、部署和应用YOLOv7。如果您对YOLO不熟悉或者对目标检测不熟悉,那么实现本文所展示的效果会有困难。后续将会对YOLOv7仓库的代码进行细致的分析,也欢迎持续关注。在实现过程中遇到任何问题,也欢迎发邮件给我。
2.准备工具
2.1 代码下载
代码的下载比较简单,直接使用git clone命令即可。
1
git clone https://github.com/WongKinYiu/yolov7
代码下载后的目录结构如下所示:

2.2 数据集下载
COCO数据集官方文档推荐的是使用脚本直接下载:
1
2
sudo apt install curl   #如果提示curl不存在的话
bash scripts/get_coco.sh
因为对wget命令更为熟悉且下载过程中经常因为网络问题而中断,因而本文修改了脚本而采用wget断点续传的方式下载。这里直接贴出修改后的脚本:
1
2
3
4
5
6
7
8
9
10
11
12
13
14
15
16
17
18
19
20
21
22
23
#!/bin/bash
# COCO 2017 dataset http://cocodataset.org
# Download command: bash ./scripts/get_coco.sh

# Download/unzip labels
d='./' # unzip directory
url=https://github.com/ultralytics/yolov5/releases/download/v1.0/
f='coco2017labels-segments.zip' # or 'coco2017labels.zip', 68 MB
echo 'Downloading' $url$f ' ...'
wget -c $url$f && && unzio $f # && unzip -q $f -d $d && rm $f & # download, unzip, remove in background

# Download/unzip images
d='./coco/images' # unzip directory
url=http://images.cocodataset.org/zips/
f1='train2017.zip' # 19G, 118k images
f2='val2017.zip'   # 1G, 5k images
f3='test2017.zip'  # 7G, 41k images (optional)
for f in $f1 $f2 $f3; do
  echo 'Downloading' $url$f '...'
  wget -c $url$f && unzip $f # && unzip -q $f -d $d && rm $f & # download, unzip, remove in background
done
wait # finish background tasks
而本文因为已经下载好了故而直接设置软链接到现有的COCO目录下即可。
1
ln -sn /home/ruben/coco/coco-2017 ./coco/
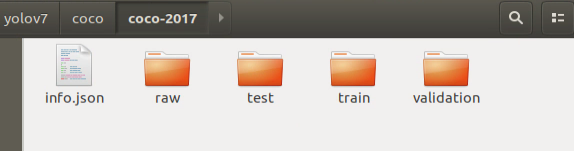
下载并解压好后的数据集目录如下所示:
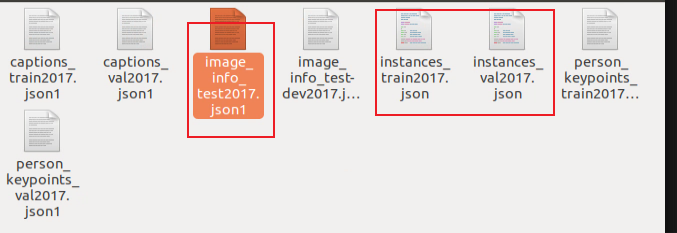
注意的是因本次训练的是物体检测,因而需要把instace*以外的json文件全部改后缀为:.json1,如下图所示:
2.3 数据集准备
由于coco数据集的标注规范为json格式,而YOLO的数据集标注规范为txt格式,从而两者的标注文件不一致,不能直接训练;所以需要将json格式转换为txt格式。这里使省去了编码和分析的过程,感兴趣的同学可以看本文开源的代码,后续将另起文章作为详细的叙述:
1
2
3
4
5
6
7
8
9
10
11
12
13
14
15
16
17
18
19
20
21
22
23
24
25
26
27
28
29
30
31
32
33
34
35
36
37
38
39
40
41
42
43
44
45
46
47
48
49
50
51
52
53
54
55
56
57
58
59
60
61
62
63
64
65
66
67
68
69
70
71
72
73
74
75
76
77
78
79
80
81
82
83
84
85
86
87
88
89
90
91
92
93
94
95
96
97
98
99


def convert_bbox_coco2yolo(img_width, img_height, bbox):
    """
    Convert bounding box from COCO  format to YOLO format

    Parameters
    ----------
    img_width : int
        width of image
    img_height : int
        height of image
    bbox : list[int]
        bounding box annotation in COCO format:
        [top left x position, top left y position, width, height]

    Returns
    -------
    list[float]
        bounding box annotation in YOLO format:
        [x_center_rel, y_center_rel, width_rel, height_rel]
    """

    # YOLO bounding box format: [x_center, y_center, width, height]
    # (float values relative to width and height of image)
    x_tl, y_tl, w, h = bbox

    dw = 1.0 / img_width
    dh = 1.0 / img_height

    x_center = x_tl + w / 2.0
    y_center = y_tl + h / 2.0

    x = x_center * dw
    y = y_center * dh
    w = w * dw
    h = h * dh

    return [x, y, w, h]

import os
import json
from tqdm import tqdm
import shutil,os

def make_folders(path="output"):
    if not os.path.exists(path):
        # shutil.rmtree(path)
        os.makedirs(path)
    return path


def convert_coco_json_to_yolo_txt(output_path, json_file,origin_image_path):
    image_path_writer=open(os.path.join(output_path,f'{output_path.split("/")[-1]}.txt'),'w')
    path = make_folders(output_path)
    image_path=make_folders(os.path.join(output_path,'images'))  #for image
    label_path=make_folders(os.path.join(output_path,'labels'))  # for label
    with open(json_file) as f:
        json_data = json.load(f)

    label_file = os.path.join(output_path, "coco.labels")   #for labels
    with open(label_file, "w") as f:
        for category in tqdm(json_data["categories"], desc="Categories"):
            category_name = category["name"]
            f.write(f"{category_name}\n")

    for image in tqdm(json_data["images"], desc="Annotation txt for each iamge"):
        img_id = image["id"]
        img_name = image["file_name"]
        img_width = image["width"]
        img_height = image["height"]

        anno_in_image = [anno for anno in json_data["annotations"] if anno["image_id"] == img_id]
        anno_txt = os.path.join(label_path, img_name.split(".")[0] + ".txt")
        with open(anno_txt, "w") as f:
            for anno in anno_in_image:
                category = anno["category_id"]
                bbox_COCO = anno["bbox"]
                classes_90to80= [0, 1, 2, 3, 4, 5, 6, 7, 8, 9, 10, None, 11, 12, 13, 14, 15, 16, 17, 18, 19, 20, 21, 22, 23, None, 24, 25, None,
                                None, 26, 27, 28, 29, 30, 31, 32, 33, 34, 35, 36, 37, 38, 39, None, 40, 41, 42, 43, 44, 45, 46, 47, 48, 49, 50,
                                51, 52, 53, 54, 55, 56, 57, 58, 59, None, 60, None, None, 61, None, 62, 63, 64, 65, 66, 67, 68, 69, 70, 71, 72,
                                None, 73, 74, 75, 76, 77, 78, 79, None]
                category=classes_90to80[int(category)]
                x,y,w,h=0,0,0,0
                if category:
                    x, y, w, h = convert_bbox_coco2yolo(img_width, img_height, bbox_COCO)
                    f.write(f"{category} {x:.6f} {y:.6f} {w:.6f} {h:.6f}\n")
                # else:
                    # if int(category)>80:
                        # print(f"{category}\n")

        shutil.copy2(f'{origin_image_path}/{img_name}',image_path)
        # break
        image_path_writer.write(f'{image_path}/{img_name}\n')
    print("Converting COCO Json to YOLO txt finished!")
# 参数一次为:训练集将要存放的目录,json文件,图片的原始存放路径
convert_coco_json_to_yolo_txt('temp/train','coco/coco-2017/raw/instances_train2017.json','coco/coco-2017/train/data')

convert_coco_json_to_yolo_txt('temp/val','coco/coco-2017/raw/instances_val2017.json','coco/coco-2017/validation/data')
2.3 环境部署
本文默认conda已经安装好了,如果未安装还需要安装好,因conda的安装不是本文的重点,这里也就不再赘述。使用conda环境且直接将环境目录设置在仓库目录下:
1
2
3
4
5
6
#创建虚拟环境目录
conda create -p ./env -y python=3.7
#激活虚拟环境
conda activate /home/ruben/gitmy/yolov7/env
#安装依赖包
pip install -r requirements.txt
3.训练
3.1 准备训练
下载预训练权重(也可不下载,在步骤3.2直接将weights参数设置为空,即’‘)
1
wget -c https://github.com/WongKinYiu/yolov7/releases/download/v0.1/yolov7.pt
如果使用默认weights参数,仓库源代码train.py中weights参数设置是错的,需要修正为如下:
1
parser.add_argument('--weights', type=str, default='yolov7.pt', help='initial weights path')
此外,即可修改data/coco.yaml中的数据集路径:
1
2
3
4
# test: ./coco/coco-2017/test-dev2017.txt  # 20288 of 40670 images, submit to https://competitions.codalab.org/competitions/20794
train: temp/train/train.txt  # 118287 images
val: temp/val/val.txt  # 5000 images
test: temp/val/val.txt  # 20288 of 40670 images,
3.2 开始训练
1
python train.py --workers 8 --device 0 --batch-size 32 --data data/coco.yaml --img 640 640 --cfg cfg/training/yolov7.yaml  --name yolov7
3.3 查看结果
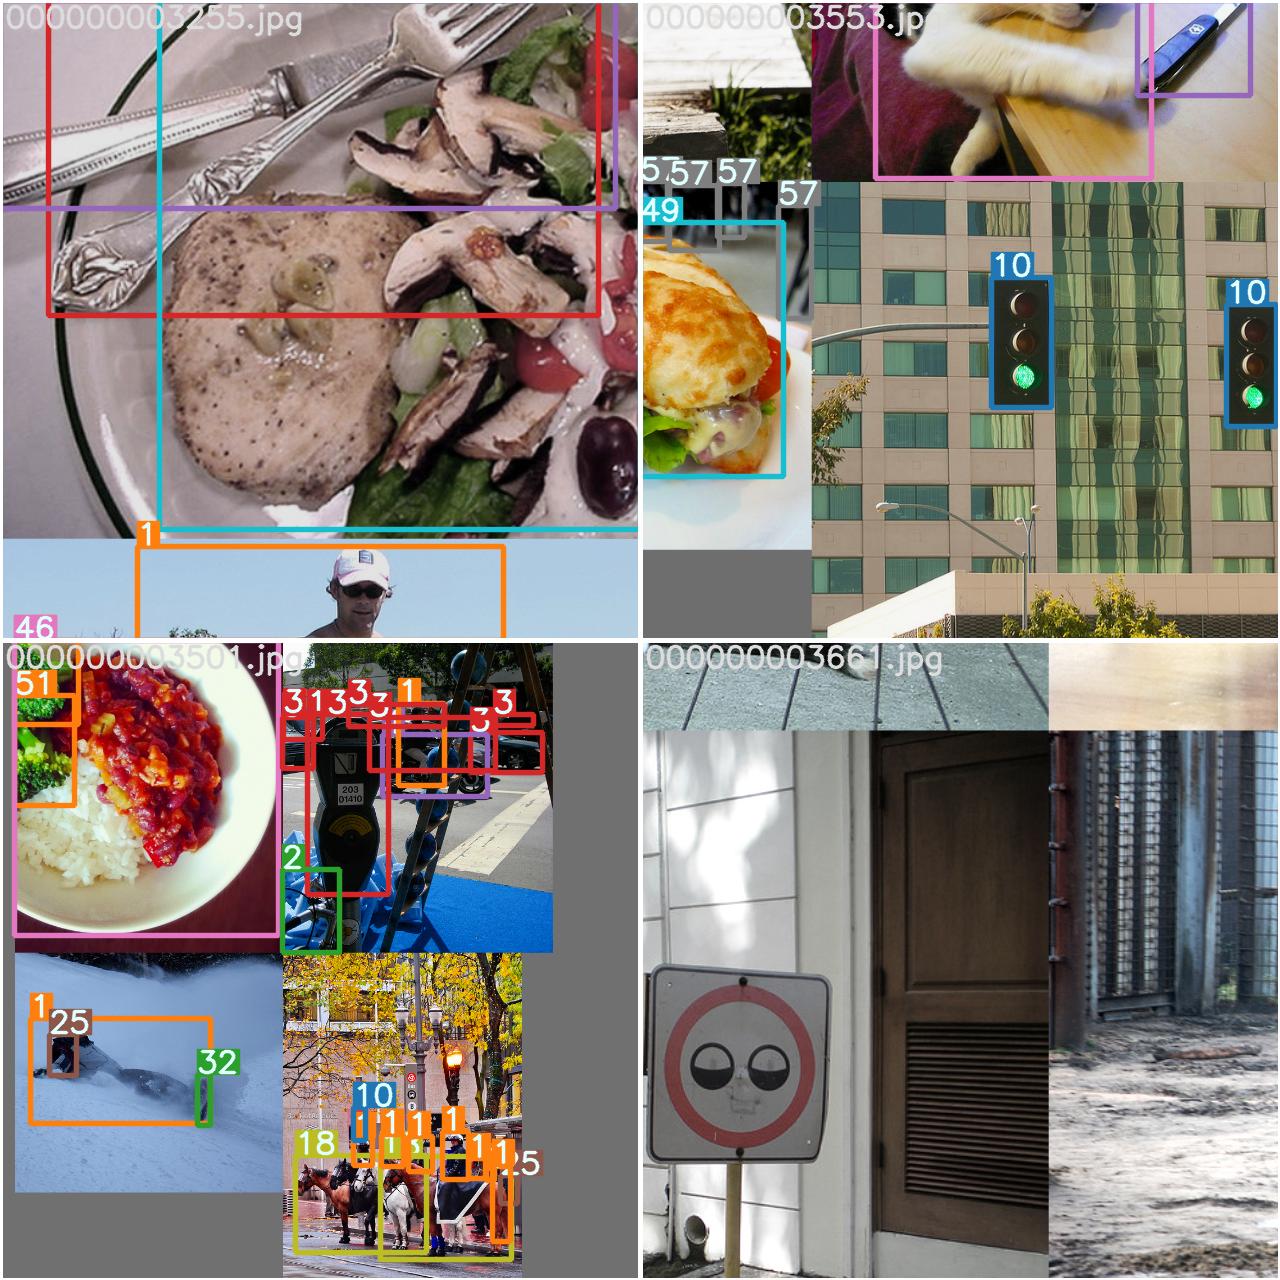
打开runs/train/exp/目录就可以看到训练的中间结果了:
4.总结
YOLO系列发展这么多年,从YOLOv5开始工程化变得极为简便。当然了,要学习的内容真的是越来越多了…同时有任何问题也欢迎随时交流~